
IBM Cloud Red Hat OpenShift
Using Red Hat OpenShift, users can deploy highly available, fully managed clusters with the click of a button. So in this blog, we will describe from the user’s point of view, how to deploy our product, EspressChart, on Red Hat OpenShift on IBM Cloud.
Docker enables us to create an image of our application with all the required dependencies prepackaged into images that can be instantly deployed in any environment. Kubernetes powers deployment and management of these Docker images across large clusters by providing self-healing and auto scaling features.
OpenShift builds on these technologies by providing a layer of tools that abstract the underlying Kubernetes and infrastructure management tasks to help developers easily deploy and manage their applications on the Kubernetes based infrastructure.
Our product, EspressChart, can run remotely by deploying EspressManager as a servlet in Tomcat.
Now we have a RedHat Docker image of EspressChart listed on https://quay.io/repository, it can be obtained with command “docker pull quay.io/sales0/ec70” or “podman pull quay.io/sales0/ec70”.
Upon EspressChart image is deployed to RedHat OpenShift cluster, Tomcat starts automatically.
To start EspressManager, go to http(s)://cluster-public-ip/EC/EspressManager.jsp. After EspressManager starts, download EspressChart.jnlp from url http(s)://cluster-public-ip/EC, then run the jnlp file to load Chart Designer.

How to deploy EspressChart
The deployment steps’ screenshots are from “RedHat OpenShift Dedicated”, which is a free sandbox from Redhat OpenShift. Note, the deployment steps on IBM Cloud RedHat OpenShift are the same. Here we assume the project and cluster are created already.
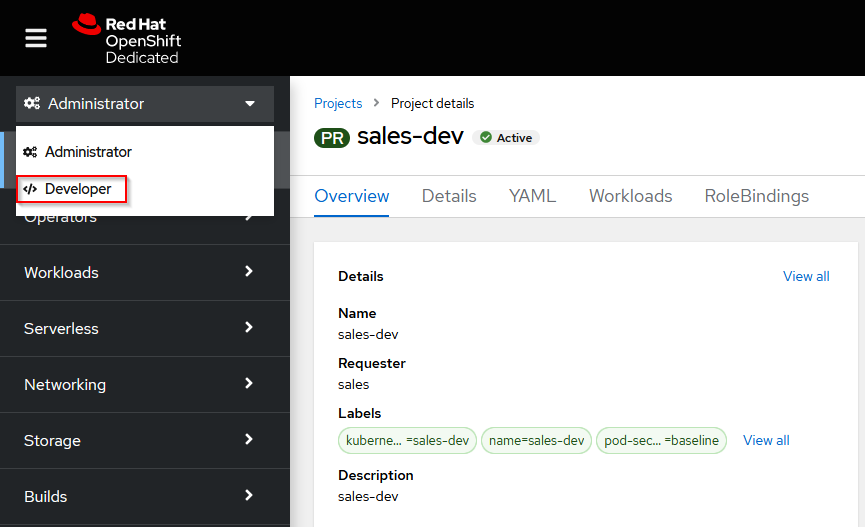
1) On Red Hat OpenShift select your project and switch to “Developer” mode.
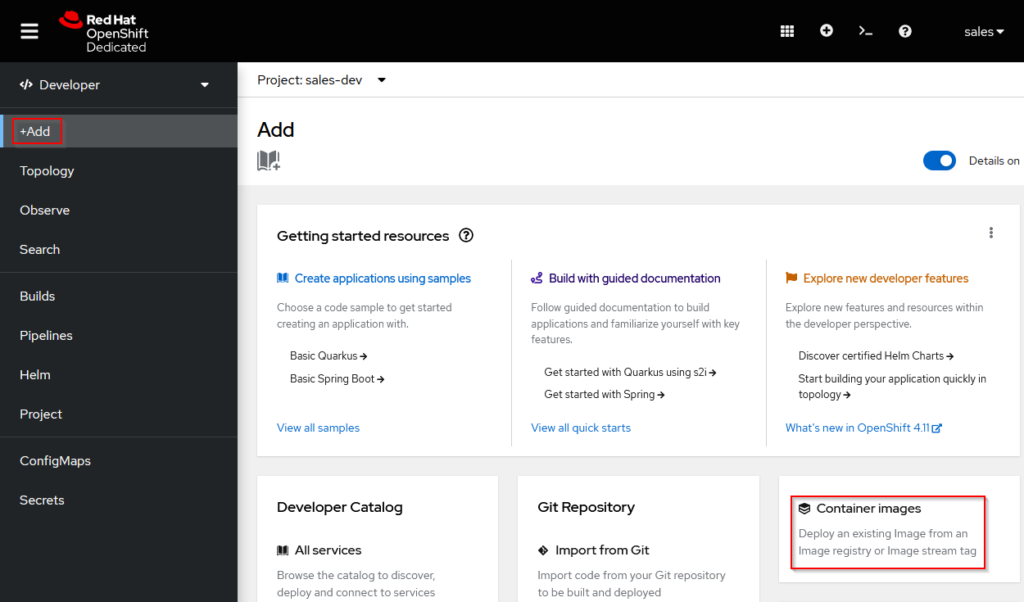
2) Click on add and select “Container images”.
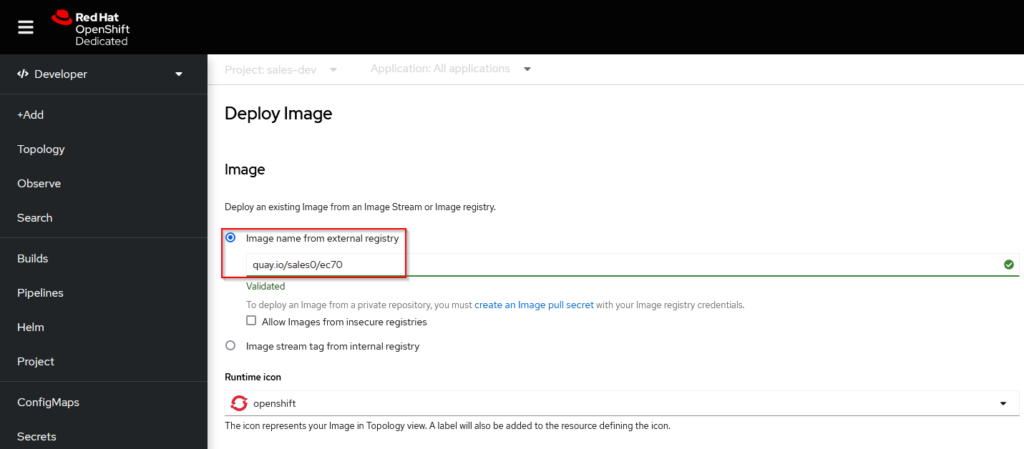
3) Deploy an existing Image from an Image registry (quay.io/sales0/ec70).
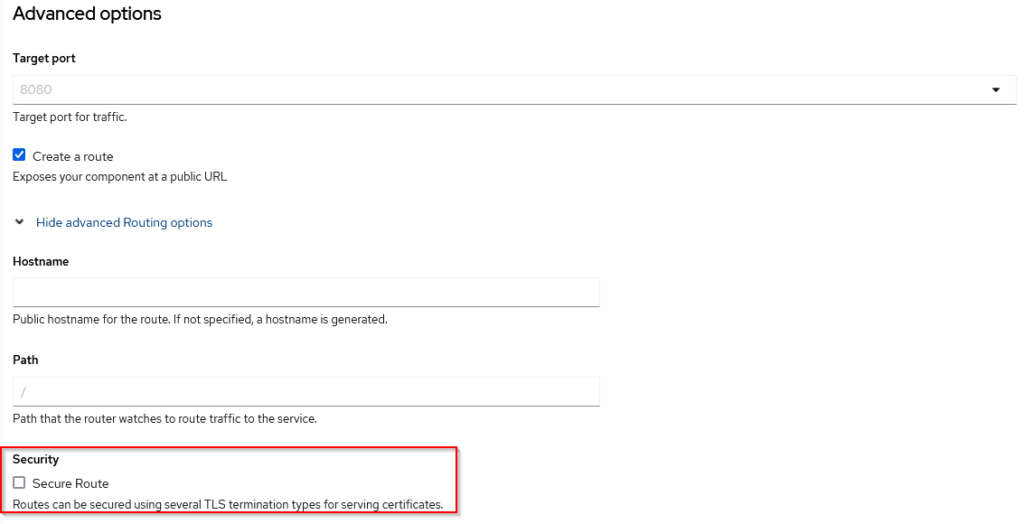
4) In order to run EC in “http”, click “Show advanced Routing options” in “Advanced options”.
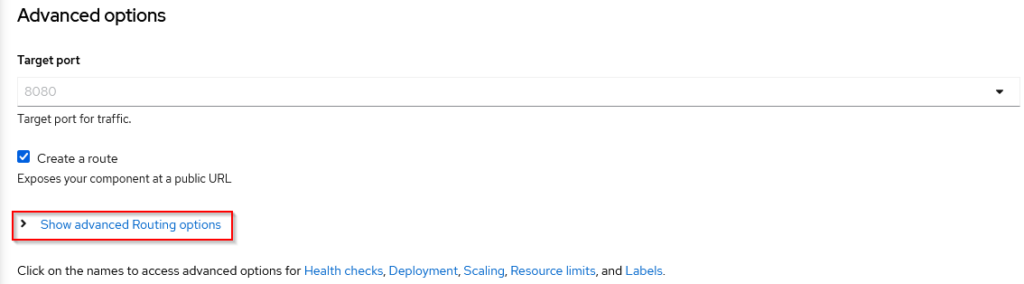
5) Uncheck the “Secure Route” option and click “Create”.
6) Make sure your pod is running and test if Tomcat is running by going to the link in “Routes”.
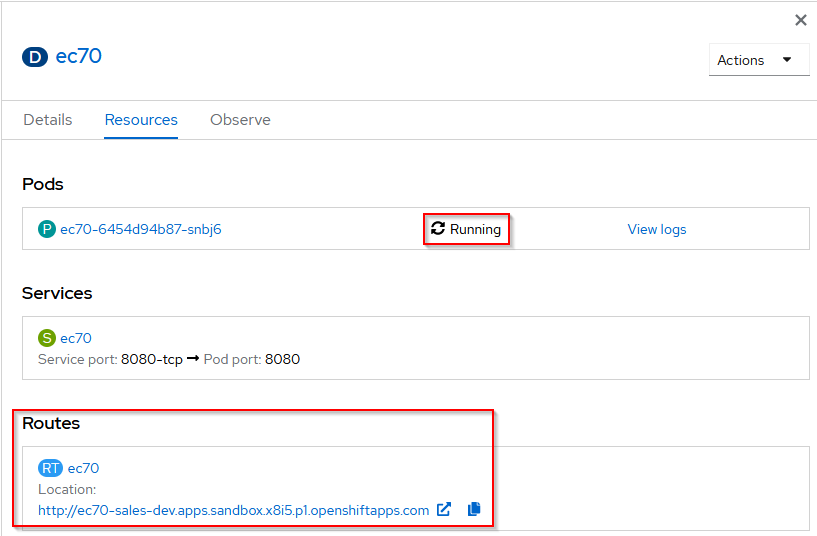
7) Now just add “/EC/EspressManager.jsp” to the end of the link in “Routes”. So in our example we need to change it from the link “http://ec70-sales-dev.apps.sandbox.x8i5.p1.openshiftapps.com” to “http://ec70-sales-dev.apps.sandbox.x8i5.p1.openshiftapps.com/EC/EspressManager.jsp” and click “Start” button to start EspressManager.

8) Now add “/EC” to the end of the link in “Routes”. It will download the EspressChart.jnlp file which you need to run and log in with guest/guest credentials and click “Start EspressChart”.

9) That’s all. The Designer opens where you can work as you are used to.

Summary
OpenShift is Red Hat’s open source container application platform for developing and hosting enterprise grade applications. Of the various cloud computing models such as Infrastructure as a Service, Platform as a Service and Software as a Service, OpenShift is Red Hat’s platform as a service offering. Once deployed OpenShift takes care of managing the underlying infrastructure components thereby enabling the developers to do what they do best – Code.